

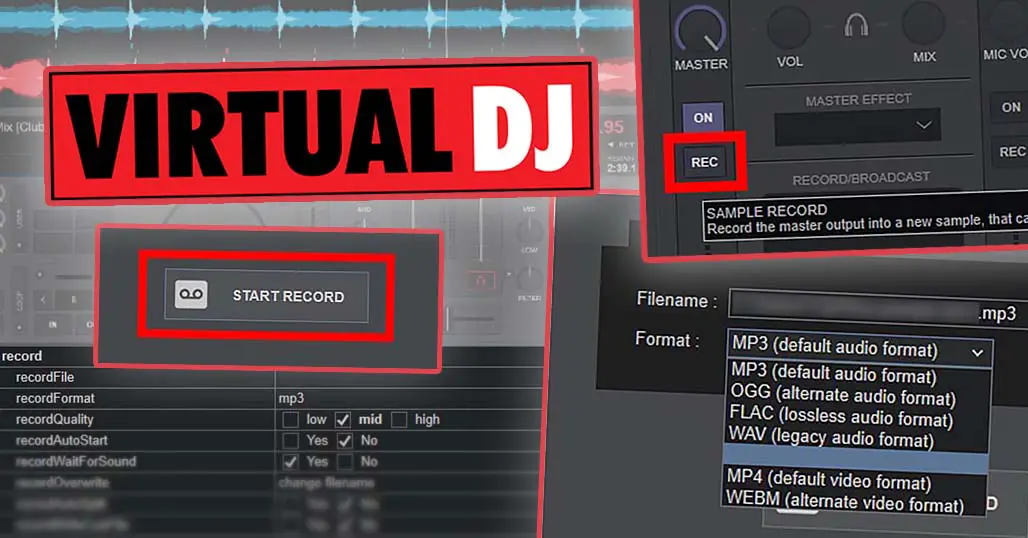
VirtualDJ Full Mix Recording And Sampling Guide. To record your mix in VirtualDJ, open the MASTER tab and press REC in the RECORD/BROADCAST section. If you’re looking for a quick way to record your DJ mixes, you’re in the right place. I’ll also go over the recording settings, DRM track restrictions, sample recording and an alternative Audacity method.
How to record a DJ mix in VirtualDJ software?
How to record your mix in VirtualDJ? Luckily VDJ software has a built-in mix recording utility that lets you record your mixes after just a few clicks.
Let’s take a quick look at the recording process, then I’ll go over all the mix recording settings that you can further customize.
To record your mix using the VirtualDJ built-in mix recording utility, follow these steps:
1. Click the MASTER tab which should be located on the right side of your virtual mixer.
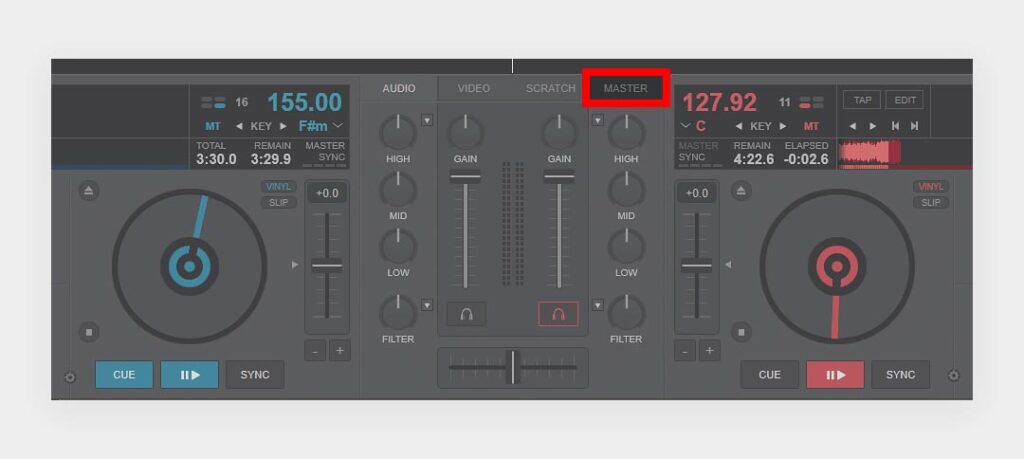
2. In the MASTER tab, click the REC button on the left side – your mix will immediately start recording.
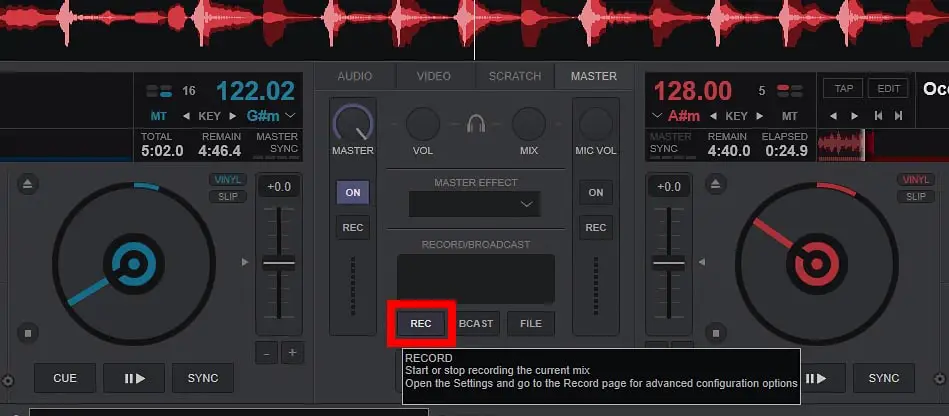
3. When you want to finish your mix recording, click the REC button again. The audio file will save automatically. Click the FILE button on the right side to open the Record settings, where you can check or change the filename, recording location and format.
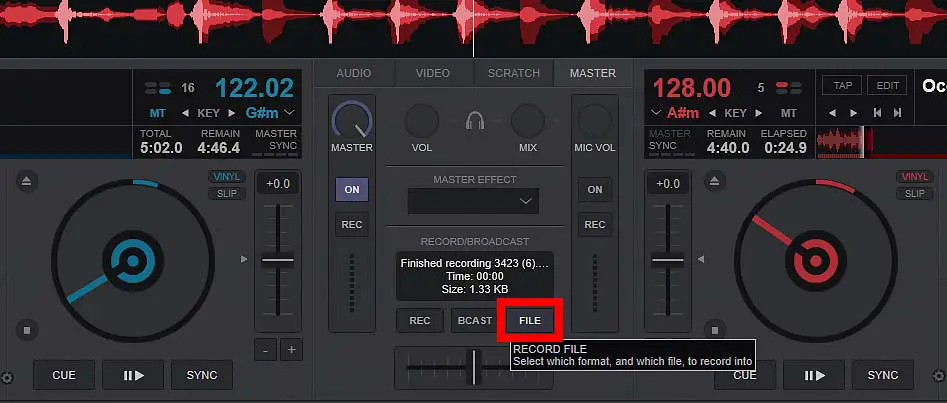
In the FILE window you will also be able to change the default mix recording location, set your recording audio file format and start a new recording.
If you’re using an external mixer setup and your recording is silent or missing external inputs, you may also need to configure a Record Loopback input in VirtualDJ’s Audio Setup.
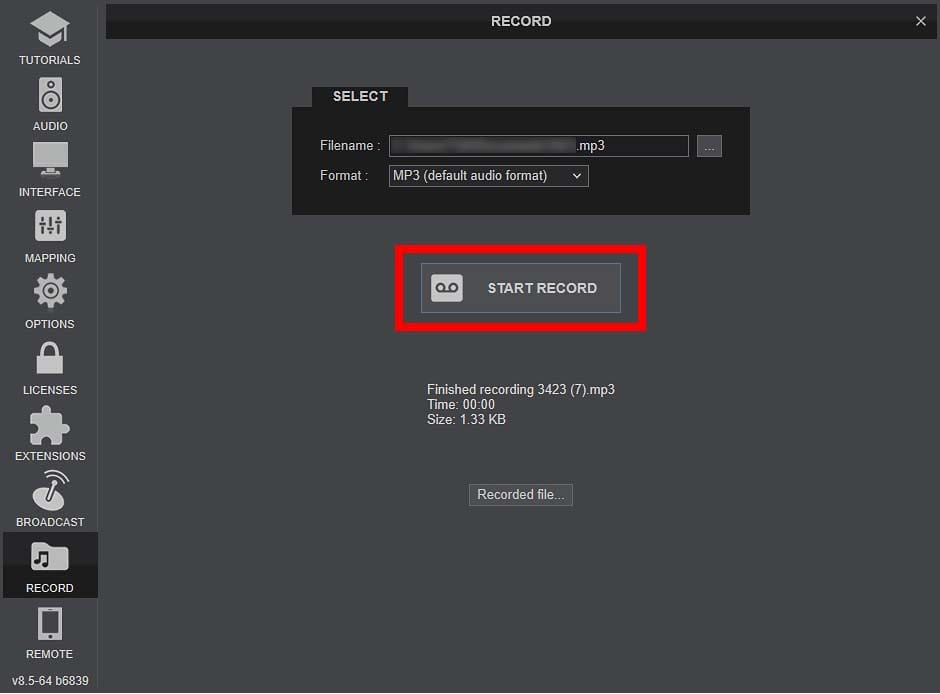
All done! When your recording is finished, you can always find it in the default recording directory (or the directory you’ve set your recordings to save in).
Where does VirtualDJ save recordings? The recording location can vary depending on your setup and previous settings. Click FILE in the MASTER panel, or go to Settings -> Record, to check the exact path currently being used.
I can’t see the MASTER tab – No master tab in VirtualDJ main interface?
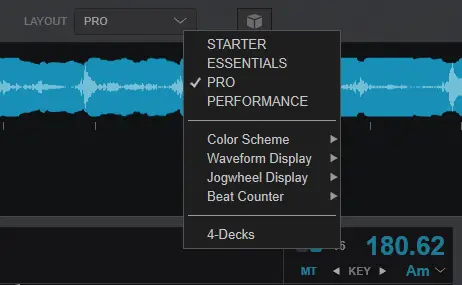
For the MASTER tab to appear in the mixer section, you have to be either in the ESSENTIALS, or in the PRO view mode.
You can browse and set the different view modes in the dropdown menu in the top left of the main VDJ screen. Then, from the MASTER tab you’ll be able to start your mix recording.
You might also like: How To Record Your Mix In Rekordbox DJ Software (Set Recording Guide)
In what audio formats can you record your mixes in VirtualDJ?
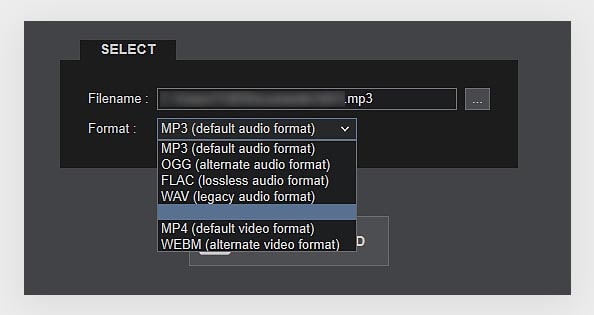
What audio formats does VirtualDJ support when it comes to mix recording? Here is a short list of all the supported audio file formats you can record your mixes to using the VDJ in-built mix recording tool.
- MP3 – the default option for mix recording is the .mp3 format (192 Kbps), there is also a possibility of further adjusting the MP3 recording file bitrate by modifying the recordQuality parameter in the recording options menu. The following pre-set recording bitrates are available:
- Low quality: 128 Kbps
- Medium quality: 192 Kbps
- High quality: 320 Kbps
- OGG – the .ogg format can be chosen for saving a bit of disk space, as OGG files tend to be smaller than MP3 ones. The default OGG recording quality is set to 160 Kbps, your other options here when it comes to the OGG file bitrate are:
- Low quality: 112 Kbps
- Medium quality: 160 Kbps
- High quality: 192 Kbps
- FLAC – VirtualDJ supports recording mixes in the .flac lossless audio format. Using the FLAC format you can record audio files in reasonable sizes without any loss in audio quality.
- WAV – legacy audio file format, will take up more disk space than the preceding ones.
There are also two file formats for recording video available on the list:
- WEBM – the default video recording format.
- MP4 – alternate video recording format.
VirtualDJ – “Not allowed to record track with DRM”
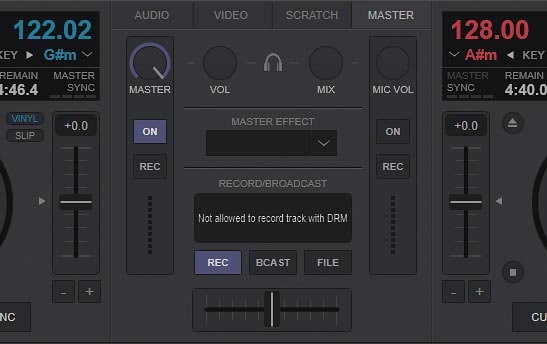
So, you’re trying to record your DJ set or sample a track in VDJ and the following message appears: “Not allowed to record track with DRM” – what does this mean?
DRM (Digital Rights Management) is a way of managing legal access to digital assets, in this case – audio files. DRM tracks, or copy protected tracks – so when it comes to VirtualDJ, all the tracks that come from the supported music streaming services, are sadly unavailable for mix recording.
One of the reasons for this, is that the tracks you stream aren’t technically owned by you, you’re simply paying for access to the music and don’t have full rights to re-record them or actually save them on your hard drive.
As of now, you can neither record your mixes that include streamed (and so, copy-protected) tracks, nor sample these tracks using the VDJ sampling utility.
If you need to record your set, the safer option is to use local music files that you own or otherwise have the right to record instead of streamed tracks.
You might also like: Streaming Services Integration With VirtualDJ
How to record samples in VirtualDJ software?
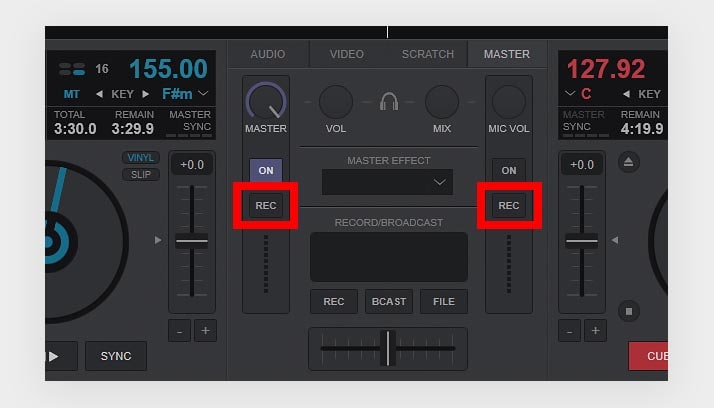
Sampling tracks in VirtualDJ is extremely easy. Here is how to do that.
1. Go to the MASTER tab which should be visible on the top right of the mixer section. There are two REC buttons on the left and right sides of the MASTER tab on your mixer.
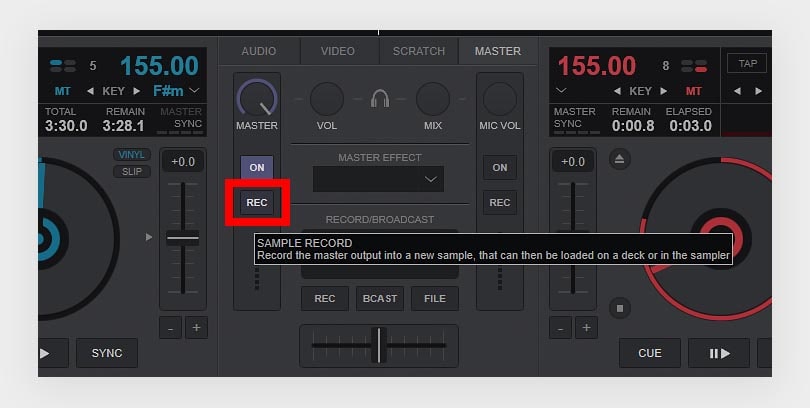
2. The left REC button after pressing will start recording a sample from your master output. When you press the REC button again, the sample recording will stop and your sample will be saved to the Recordings section of your music library. To find the “Recordings” folder, expand the “Sampler” folder in your music library section on the bottom left of your screen and click the “Recordings” folder. The right REC button will do the same for your microphone output.
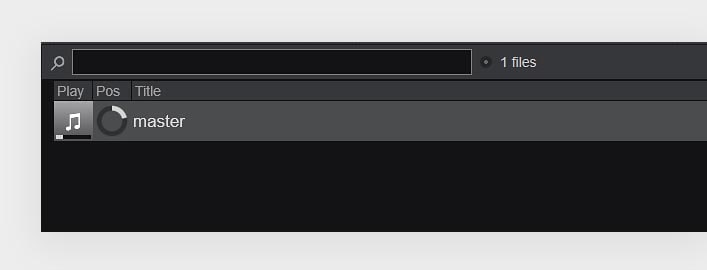
Your recorded samples will be saved to the “Recordings” folder and you’ll be able to use them either by loading them on one of your decks, or into VirtualDJ sampler.
If you ever want to use one of those recordings outside VirtualDJ, I’ve also got a quick guide on how to convert VirtualDJ samples to MP3.
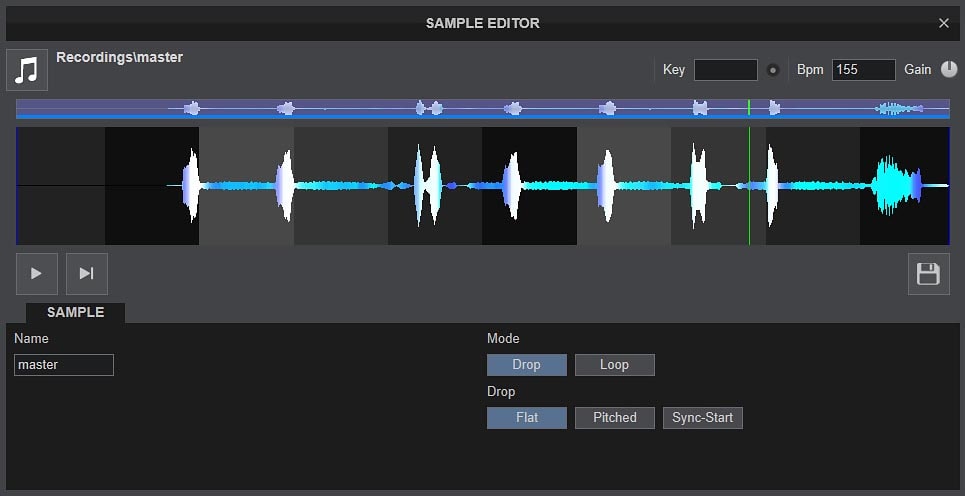
How to edit recorded samples in VirtualDJ? There is a way to edit the samples you’ve just recorded. Right clicking on one of your samples in the “Recordings” folder will reveal a menu with a “Sample Editor” option available. Click it and a simple sample edit tool will open.
Here you’ll be able to cut, loop and pitch your recorded sample and change its tempo and loudness.
VirtualDJ mix recording settings explained
If you’d like to further customize your mix recording settings, click the cog button on the top right of the main VirtualDJ screen.
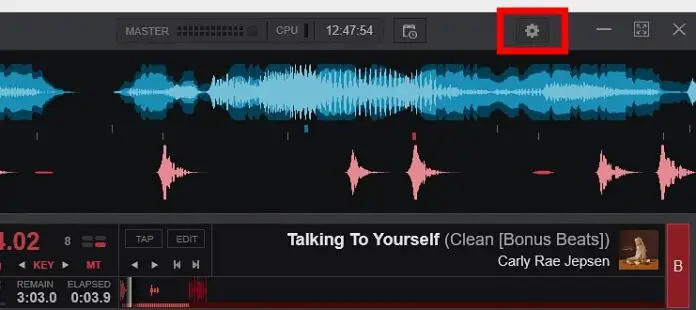
Then, in the OPTIONS tab, click the RECORD button. This will take you to all of the available mix recording settings.
You can also get to this menu by typing “cat:record” into the search bar in the OPTIONS tab.
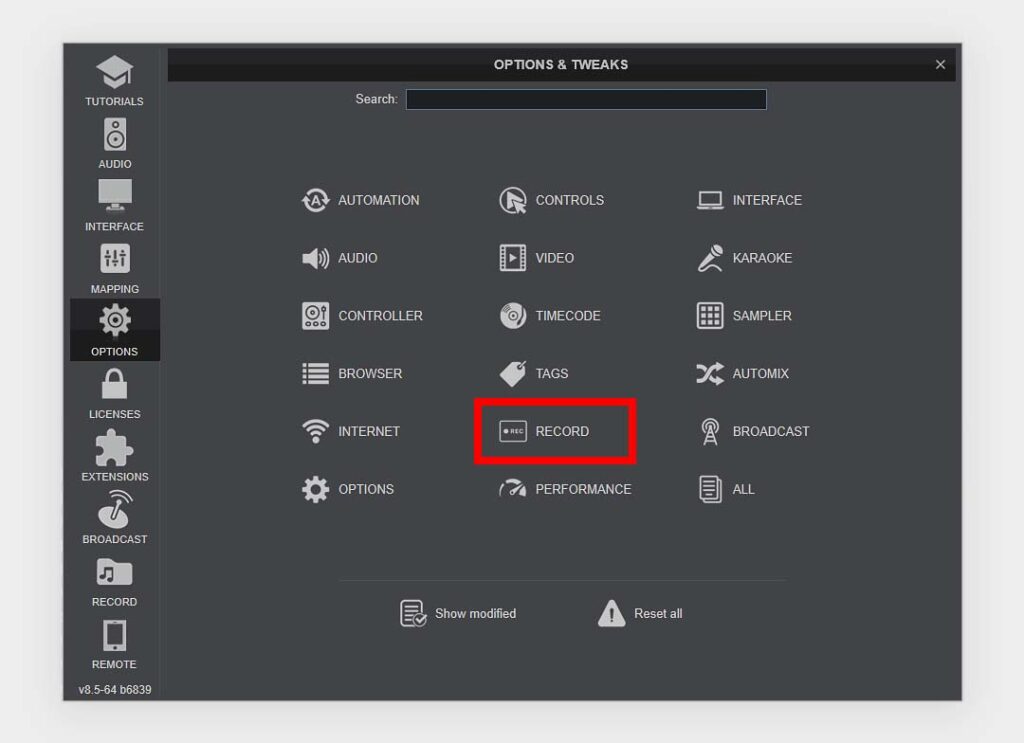
Here you can see the audio file format and recording quality settings, recording auto start, “wait on sound” feature setup and much more.
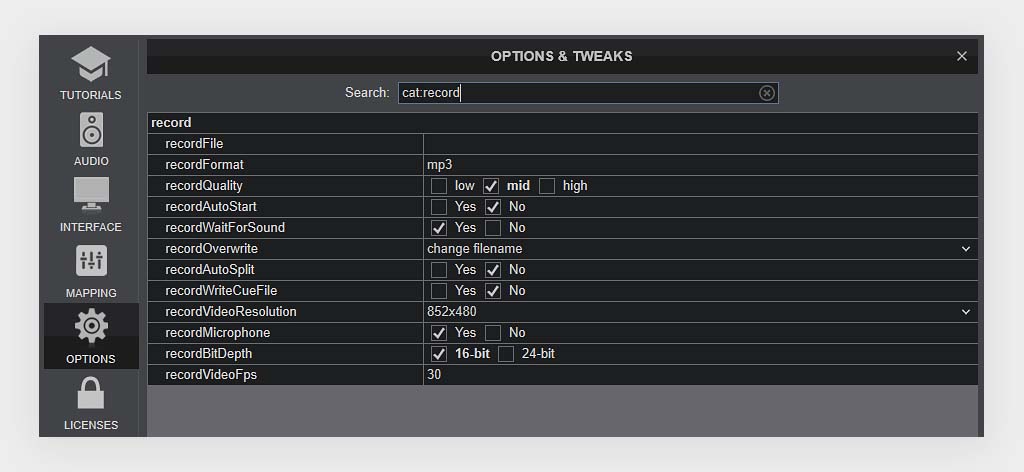
Here are short explanations of what each of these settings does:
- recordFile – here you can set the file path under which you wish your recording to be saved.
- recordFormat – choose one of the available audio or video file formats for your recording.
- recordAutoStart – when this is on, your recording will start as soon as you press play on one of your decks.
- recordWaitForSound – if this is on, the recording won’t start until audio starts playing.
- recordPauseOnSilence – pauses the recording during longer periods of silence and resumes when sound comes back.
- recordOverwrite – choose an action the software should perform when you’d be about to overwrite your existing mix recording.
- recordAutoSplit – creates a new recording file each time you move your crossfader from one deck to the other.
- recordWriteCueFile – enables you to record a .cue file alongside with your audio recording.
- recordVideoResolution – if you’re recording a video mix, you can set the final recording resolution here.
- recordMicrophone – you can choose whether you’d like the microphone audio output to be included in the main recording or not.
- recordBitDepth – choose between 16-bit and 24-bit audio files (only for .WAV and .FLAC audio file formats).
- recordVideoFps – again, if you’re recording your video mix, you can set the final recording FPS value here.
The Audacity mix recording method
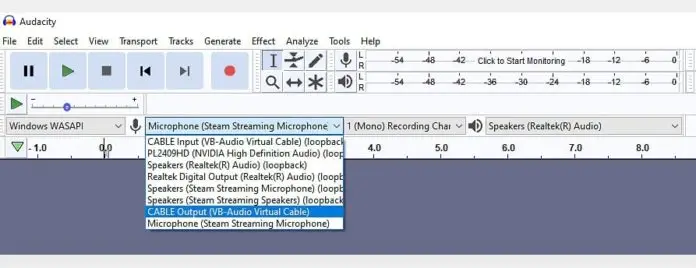
There is a way to record your mixes in VirtualDJ without using the VDJ in-built mix recording tool.
Here is the software you’ll need for that.
- Audio recording software: Audacity / OBS (both work for Mac and Windows).
- Virtual audio cable software: VB-Cable (for Mac & Windows), Blackhole (for Mac).
This alternative recording process will be the exact same for each piece of DJ software you’ll decide to record. If you want to know more about recording your DJ sets using Audacity, refer to the instructions here: How To Record Your Mix In Rekordbox DJ Software (+Audacity Method).
Note: This method gives you an alternative recording path, but it doesn’t change the licensing or TOS restrictions that apply to streamed music.
Serato vs. VirtualDJ software – Which one is better for you?
Can you record your DJ sets easier using other DJ software?
DJ software like Serato DJ Pro, Traktor Pro 3, Rekordbox and the likes, all have their own mix recording utilities. These are in general equally easy to use as the VirtualDJ mix recording tool.
When it comes to DJ software like Serato DJ Lite, where mix recording isn’t available, there are a few ways to work around that.
Other than that, you can always rely on 3rd party audio recording software like Audacity or OBS I mentioned earlier. This gives you another relatively easy way of recording your mix audio regardless of the DJ software you’re using.
