
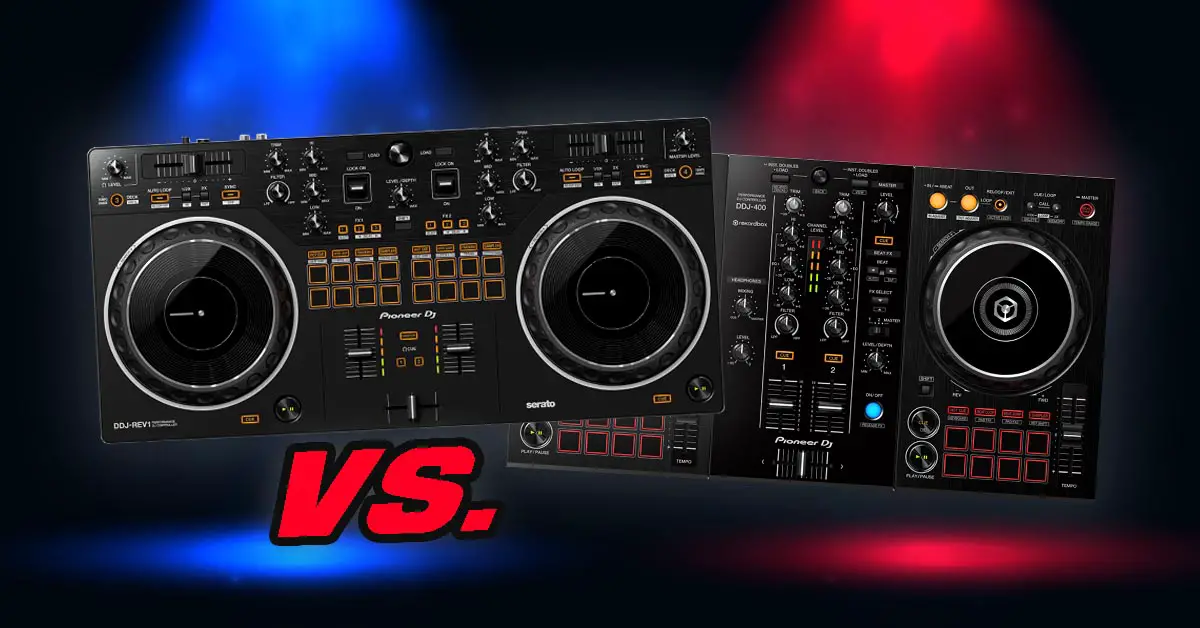
Pioneer DDJ-400 vs. DDJ-Rev1 – straight to the point detailed DJ controller comparison. The DDJ-400 has now been discontinued and replaced by the DDJ-FLX4, but it’s still widely available second-hand and remains a perfectly usable beginner controller. So, if you’re choosing between a used DDJ-400 and the DDJ-Rev1, which one should you get? I’ll answer that below.
If you’re interested in other affordable DJ controllers good both for beginners and more advanced users, check out this extensive article about DJ gear that I do recommend here: What Equipment Do You Need To DJ?
This web portal is reader-supported and is part of the AliExpress Partner Program, Amazon Services LLC Associates Program, eBay Partner Network, and Guitar Center Affiliate Program. When you buy using links on our site, we may earn an affiliate commission.
Pioneer DDJ-REV1 vs. DDJ-400 – full specification comparison
| Specs |
|---|
Different control layouts
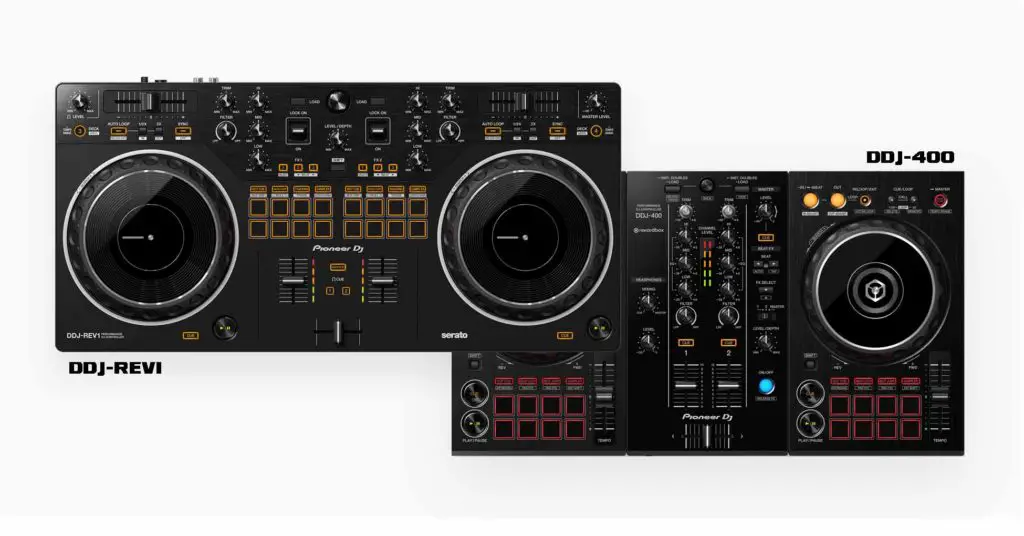
The key difference between the Pioneer DDJ-Rev1 and the Pioneer DDJ-400 is the control layout used in both of the devices.
The DDJ-400 utilizes a club layout that is based on a setup that is most commonly found in club DJ booths, a setup consisting of two professional DJ media players, such as Pioneer CDJs, and a single audio mixer in between.
The DDJ-Rev1 on the other hand, features a battle style layout, a control layout based on a traditional battle style DJ setup – two vinyl turntables rotated by 90 degrees counterclockwise (with tonearms positioned away from the user) and an audio mixer in between.
More on battle style DJ controller layouts here: What Is A Battle Style DJ Controller Layout? – Quickly Explained
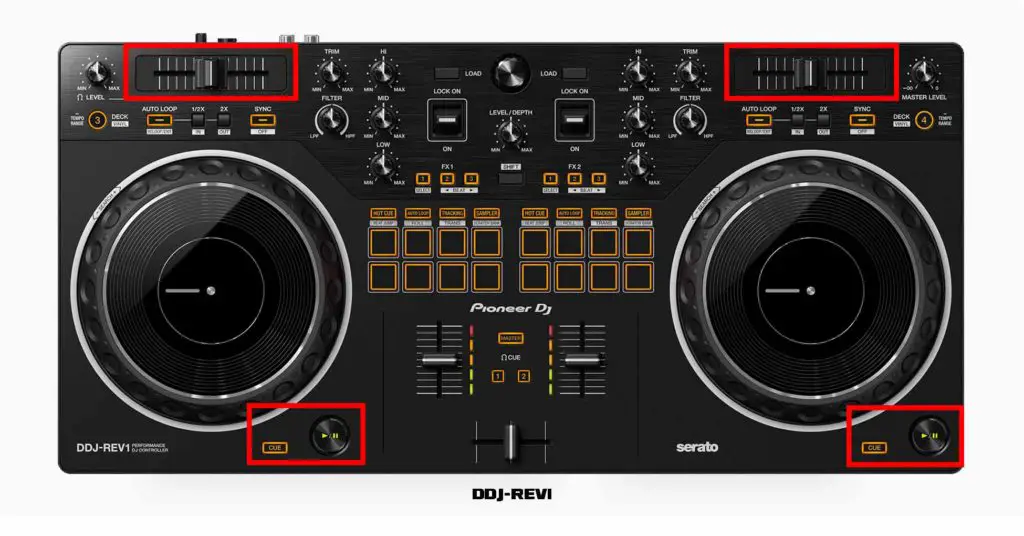
Because of these layout choices, on the DDJ-Rev1 the tempo faders are located on top of each of the deck sections and the play/pause button is placed asymmetrically in the bottom right of the decks.
Since vinyl turntables don’t have a cue button, the DDJ-Rev1 adds one next to the play/pause button for conventional DJ controller operation.
You can find the performance pads on the DDJ-Rev1 in the middle of the mixer section, rather than under the jog wheels like on the DDJ-400.
On the DDJ-400, the tempo faders are also placed asymmetrically, but here they are located on the right side of the performance pads, underneath the jog wheel.
The play/pause and cue buttons are placed on the opposite side of the performance pads.
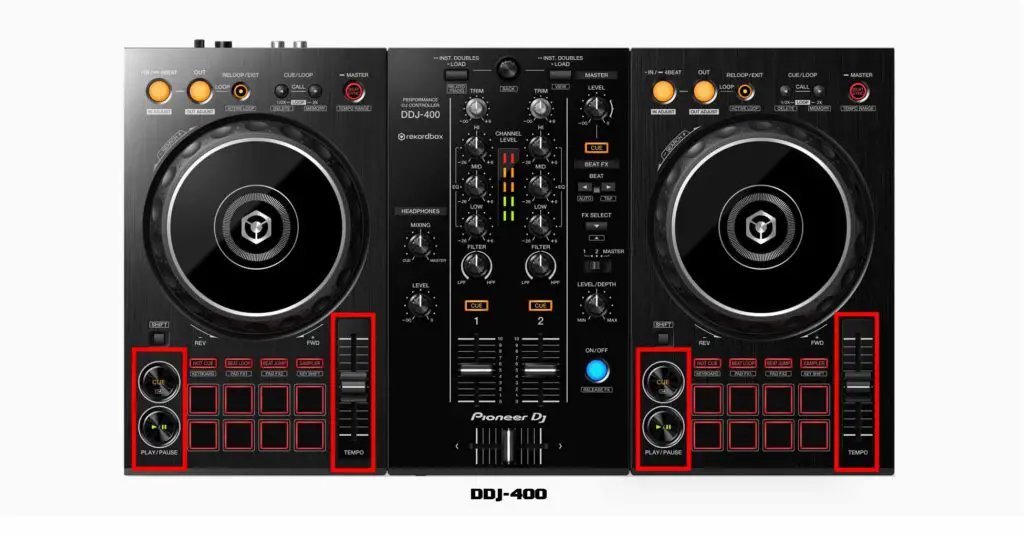
If you’re just starting out, it doesn’t really matter which layout you decide to go with. Generally, the battle style layout is better suited to scratch and open-format DJs, while the club layout more closely resembles the CDJ + mixer setups commonly found in club environments.
Choosing one layout over the other will help you to adjust to a similar setup in a possible future, but will definitely not be a factor that will affect your future skills or ability to learn more advanced mixing techniques.
The mixer sections
The mixer section on the DDJ-Rev1 is modeled after a famous line of Pioneer DJM-S mixers generally meant for scratch DJs. It’s a lot wider than the mixer section of the DDJ-400, as it has to contain two sets of performance pads (slightly smaller than these on the DDJ-400) and FX paddles (which the DDJ-400 doesn’t have).
The DDJ-400 has a much narrower mixer section modeled after the Pioneer DJM line of DJ mixers, with a Beat FX strip on the right side and additional headphone control knobs on the left (on the DDJ-Rev1 these knobs are located on a deck rather than on a mixer).
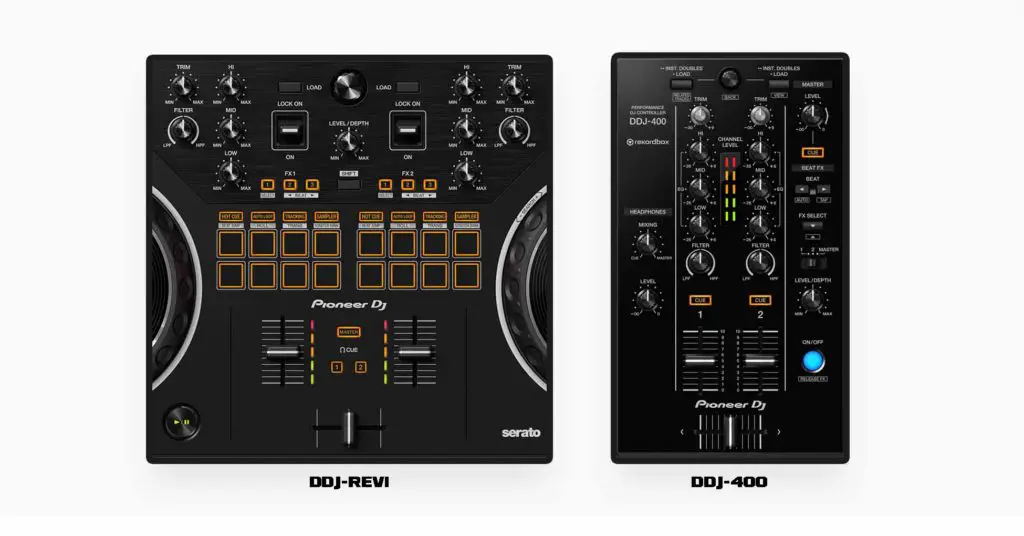
It’s also important to mention that the DDJ-Rev1 doesn’t feature a cue/master headphone regulation knob that the DDJ-400 has. This means that the balance between the master audio and the cue audio in your headphones will have to be adjusted in-software.
The mixer section on the DDJ-Rev1 is much more friendly towards scratch DJs which is not a big surprise, as it’s modeled after a mixer which is essentially meant to be used for scratch performances. The DDJ-400 will generally better suit a club DJ, as its mixer controls closely resemble the Pioneer DJM mixer line which is most commonly used in club environments.
Now it’s time to talk about the audio FX controls on both the DDJ-Rev1 and the DDJ-400.
| Pioneer DDJ-Rev1 on Ebay: |
| Pioneer DDJ-400 on Ebay: |
The FX sections
The FX control scheme vastly differs between the DDJ-Rev1 and the DDJ-400. On the DDJ-Rev1 you can find two FX paddles and two FX banks with 3 effects on/off buttons, alongside with one level/depth FX parameter control knob.
The DDJ-400 on the other hand, features a single Beat FX strip with an FX select button, FX channel selection switch and a level/depth knob. DDJ-400 also has dedicated buttons for controlling the FX beat division (on the DDJ-Rev1 you can change the beat divisions using FX buttons and the shift button).
The FX paddles on the DDJ-Rev1 can either be activated temporarily in hold mode when pushed down, or toggled permanently when pushed up. When activated, the FX paddles will engage the FX you’ve turned on using the orange FX selection buttons.
On the DDJ-Rev1 you can activate up to 3 FX on each deck at once, while on the DDJ-400 you can only use one effect at the time on either channel 1, 2 or master output.
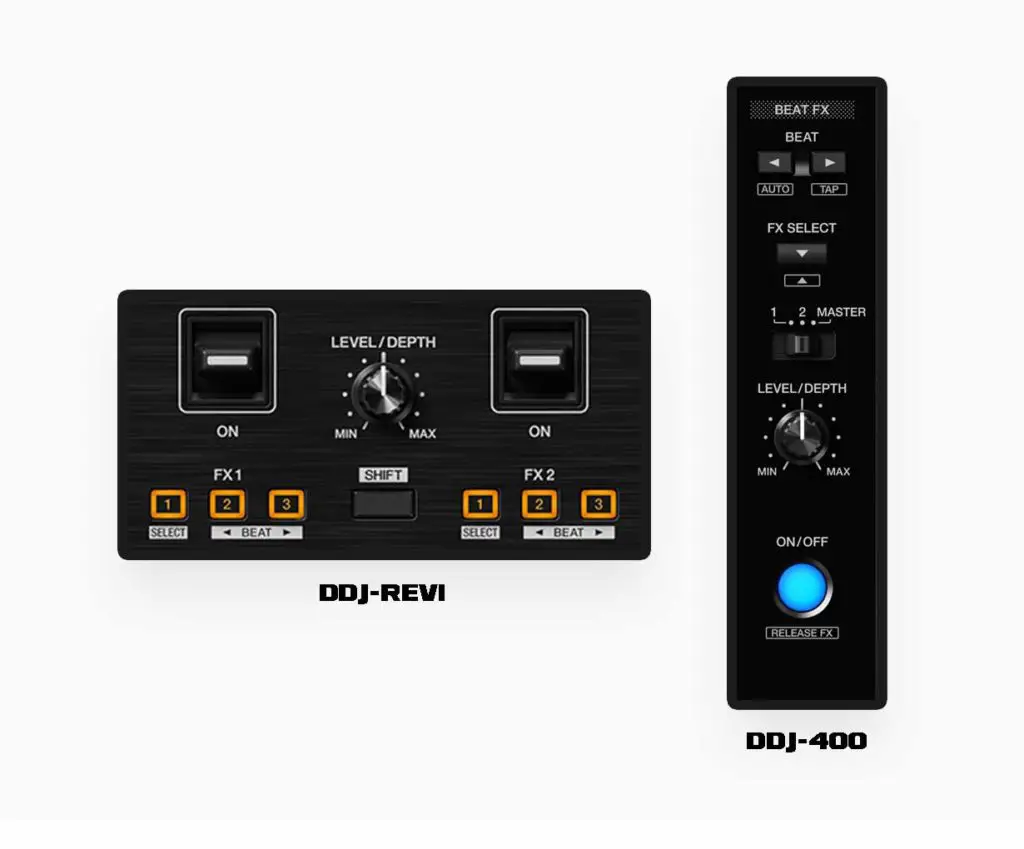
On the DDJ-400 you can cycle through the software effects using the FX Select button, while on the DDJ-Rev1 you can only change the first effect from the FX bank from the controller. To change the remaining two effects in a bank you’d have to use your laptop.
The DDJ-400 also has an advantage of making use of the Rekordbox Pad Release FX, while the DDJ-Rev1 working under Serato DJ doesn’t give you that option.
Overall the DDJ-Rev1 gives you better FX control and allows you to trigger multiple FX on one channel, while the DDJ-400 has the advantage of highly customizable Pad Release FX in addition to its Beat FX strip effect section.
Performance pads
There are two main differences between the performance pads on the DDJ-400 and the DDJ-Rev1. The first one is the pad size.
While the performance pads look and work in the exact same way on both devices (soft rubbery finish and a click at the end of button travel), their size differs by quite a lot. Performance pads on the DDJ-Rev1 are smaller than these on the DDJ-400, as they had to be crammed in the tight space between the two decks.
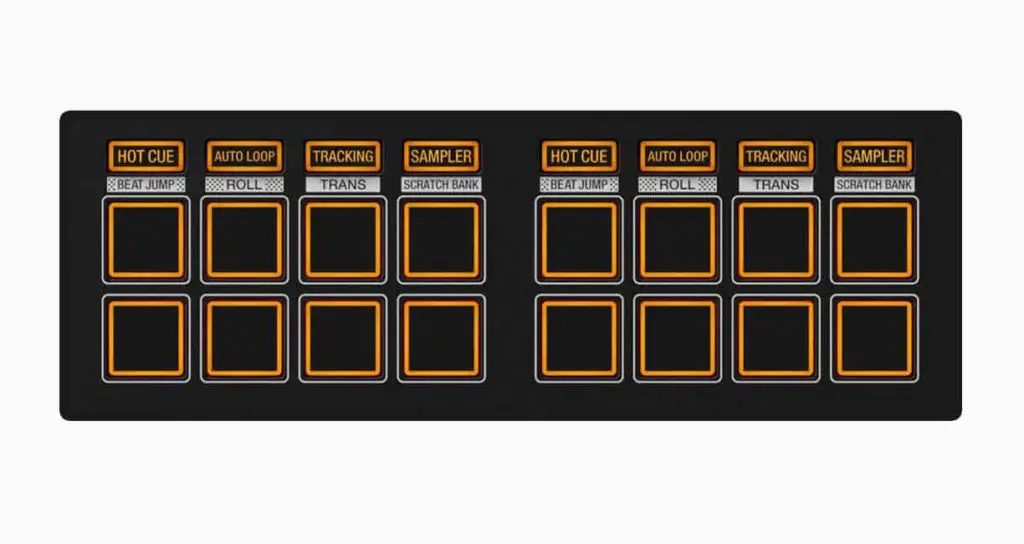
Other than that, the 8 performance pad modes also differ between these two devices, the main reason for that being the software differences between Serato DJ and Rekordbox.
DDJ-Rev1 features the following performance pad modes:
- Hot Cue – 4 hot cues available
- Auto Loop – same as Beat Loop on the DDJ-400
- Tracking Scratch – a quasi-auto-scratch feature that controls the crossfader movements while you are only in charge of moving the platter to produce scratch sound patterns.
- Sampler – 4 sample slots available
- Beat Jump (only with Serato DJ Pro) – allows you to jump a set number of beats forwards or backwards while maintaining the track’s tempo synchronization
- Roll (only with Serato DJ Pro) – quick access to multiple short loop values
- Trans – a sound ducking effect with different accessible beat divisions for each pad (8 trans effect patterns available in total)
- Scratch Bank – a feature that allows you to quickly access your custom scratch samples on each deck and then with a press of a button return to the track that was playing before the scratch bank activation
And these are the performance pad modes available on the DDJ-400:
- Hot Cue – 8 hot cues available
- Beat Loop – same as Auto Loop on the DDJ-Rev1
- Beat Jump – same as on the DDJ-Rev1
- Sampler – 8 sample slots available
- Keyboard – allows you to control the pitch of a cue point
- Pad FX 1 – fully customizable Rekordbox pad FX bank #1
- Pad FX 2 – fully customizable Rekordbox pad FX bank #2
- Key Shift – gives you ability to shift the key of a playing track
Tracking Scratch mode on the DDJ-Rev1
The DDJ-Rev1 features a Tracking Scratch mode that can be activated using the performance pads.
When it’s activated, the tracking pad mode will control the crossfader movements for you and return the track to the cue point automatically when you move the jog wheel. It allows you to perform 6 different scratches just by moving the jog wheel in a timely manner, without touching the crossfader. This way you can slowly learn the hand movements necessary for performing each of the available scratch patterns without worrying about the crossfader gymnastics.
This kind of behavior places it above the DDJ-SB3 auto pad scratch feature which automatically performed the whole scratch for you without any room for variations or additional control, and also way above the DDJ-FLX6 jog cutter mode.
There are a few crossfader scratch patterns to chose from and you can select each one of these using the performance pads when the tracking mode is active.
Following scratch patterns are available in the tracking mode on the DDJ-Rev1:
- Forward Stab
- Reverse Stab
- Chirp
- Orbit
- Crab
- Stab/Baby Combo
Jog wheels
Both the Pioneer DDJ-Rev1 and the DDJ-400 feature touch sensitive capacitive jog wheels that can be used both for scratching, beatmatching and track position control.
The jog wheels on the DDJ-Rev1 are definitely one of the selling point of this device. They are slightly bigger than these present on both the Pioneer DDJ-400 and the DDJ-SB3 controllers.
The DDJ-Rev1 has 154 mm (6.06-inch) jog wheels, compared with the smaller 132 mm (5.2-inch) jog wheels on the DDJ-400.
Jog wheels on the DDJ-Rev1 are comparable in size to the jog wheels present on controllers such as the DDJ-SX or the DDJ-RX controller series.
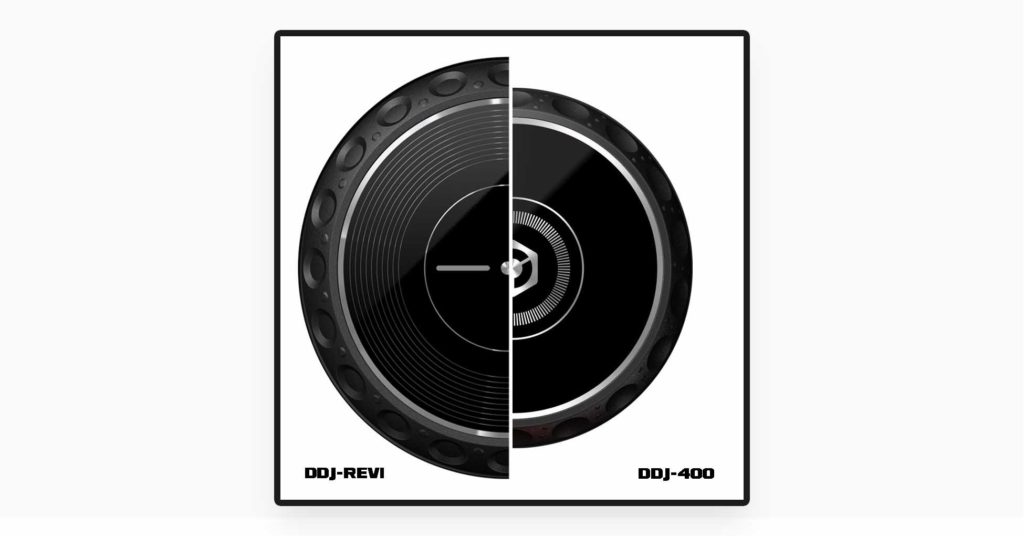
Other than that, the jog wheels on the DDJ-Rev1 do feel slightly better than these present on the DDJ-400, feature a simple needle indicator and a rubbery perforated edge to allow for comfortable pitch bending. All in all if you’re in for some scratching the DDJ-Rev1 would be a better choice for you.
If you’re curious about cheap entry-level DJ controllers with even bigger jog wheels, be sure to check out my take on the DDJ-FLX6 here: Pioneer DDJ-FLX6 – DJ Controller Overview
Software compatibility
The DDJ-Rev1 was designed primarily as a Serato DJ controller. It unlocks Serato DJ Lite when connected, while Serato DJ Pro is available as a paid upgrade. The Pro upgrade gives you access to the full Serato feature set and the additional pad modes marked on the controller.
The DDJ-400 was originally designed around Rekordbox, and connecting it still works as a Hardware Unlock device for Rekordbox 7 Performance mode without requiring a paid subscription.
One major change since this comparison was originally published is that Serato added official DDJ-400 support in 2024. The DDJ-400 can now unlock Serato DJ Lite as well, with Serato DJ Pro available as a paid upgrade. This means software compatibility is no longer as big a dividing line between these two controllers as it once was.
The main difference is therefore the workflow each controller was designed around: the DDJ-Rev1 has its scratch-oriented battle layout and Serato-focused controls, while the DDJ-400 was originally designed around Rekordbox and a more conventional club-style layout.
Inputs and outputs
Both the Pioneer DDJ-Rev1 and the DDJ-400 have built-in soundcards and feature the exact same inputs and outputs:
| Inputs | 1x microphone input (1/4″ TS Jack) |
|---|---|
| Outputs | 1x master output (RCA), 1x headphones input (1/8″ stereo mini jack) |
| Other | 1x USB B port (for laptop connection and power) |
The only thing that might put both these devices at a slight disadvantage is that both of these feature only a mini jack (3.5mm or 1/8″) headphone outputs.
This means that if you plan to use any kind of professional headphones with a 1/4″ jack cable you will have to use a bulky adapter for that. Other than that, the outputs offered in this price point are perfectly fine.
Other than that, on the DDJ-Rev1 the microphone input is routed through your laptop, which means you are able to easily add the live audio from your microphone to your stream or mix recording without using any additional hardware.
The conclusion
The Pioneer DDJ-Rev1 and DDJ-400 are both capable entry-level DJ controllers, although the DDJ-400 is now discontinued and generally only worth considering if you can find a good deal on a used unit.
If you’re buying new, the DDJ-FLX4 is the modern successor to the DDJ-400 and is a much more relevant alternative to the DDJ-Rev1 today.
This means that they will be great both if you haven’t touched a DJ controller ever before and if you just need a semi-portable DJ device that you can easily hook up to your laptop and perform without many compromises.
The best thing about both of these devices is that they have all the features that you need for both basic and more advanced mixing, and that means that it will most probably take you quite some time to outgrow them as a beginner.
If you’re interested about other DJ controllers suitable both for beginners and intermediate users check out this article: Best Pioneer DJ Controllers For Beginners – Which one should you choose?